Table of contents
Introduction
watchRTC requires you to integrate an SDK with your own running code. For that purpose, you will need to add the watchRTC iOS SDK to your iOS application.
The SDK has been designed to be as efficient as possible and use minimal device resources. However, a mobile application can affect the SDK’s ability to collect stats and send events. With this in mind, there are a few things that you, as the developer, should consider before installing the SDK.
- Network connectivity: If the device is not connected to the internet, the SDK may not be able to send events or send them with delay.
- Implementation: If the SDK is not implemented correctly with any 3rd party web RTC libraries that are being used, it will hinder our ability to collect data.
To start using the watchRTC iOS SDK library to collect WebRTC-related data from your iOS app, you must first perform a few basic tasks. Then you can begin to log and analyze your data.
For integration with the SDK, you will first need to have a watchRTC API key. If you haven’t already done so, please make sure to create a watchRTC API key before you continue.
Install the SDK.
First, you will need to select a package manager to use. The watchRTC iOS SDK can be installed using Swift Package Manager, CocoaPods, or Manually.
SDK Support: This library supports iOS 13.0 and later.
Swift Package Manager.
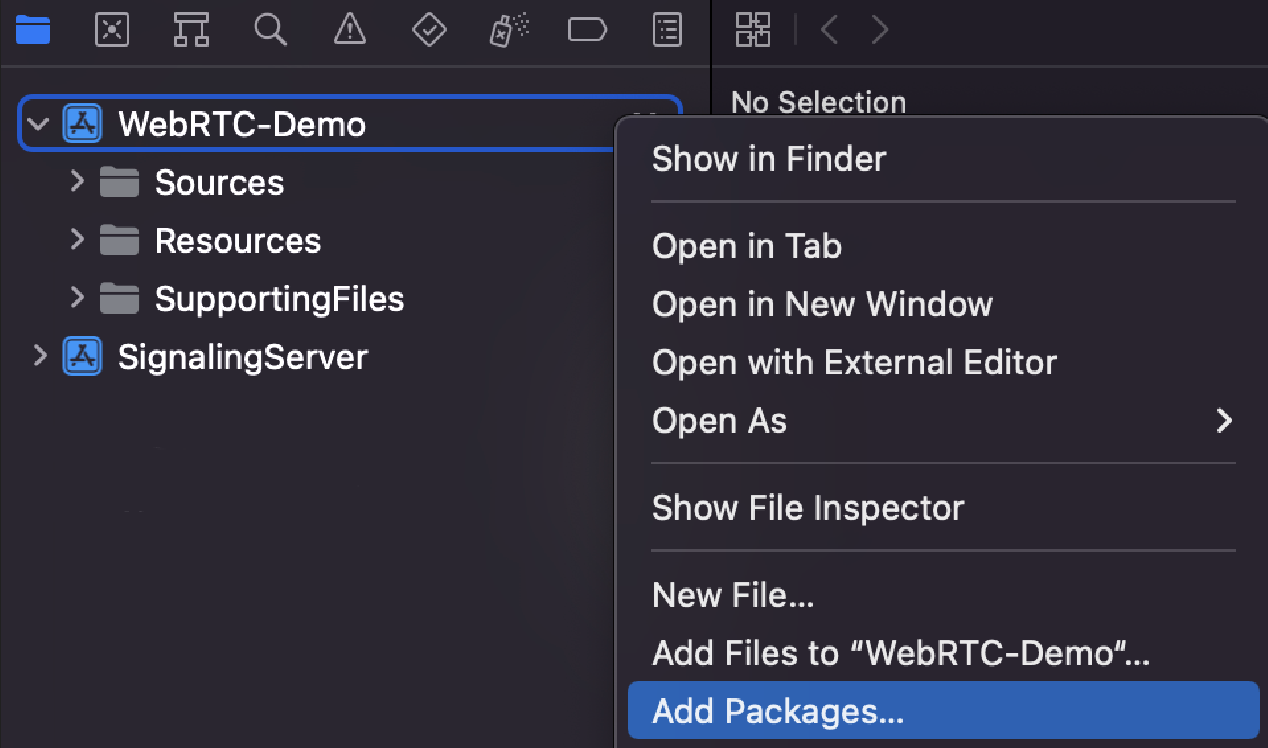
- Right-click on your project’s name and choose Add Packages:
- On the new window that opened, paste the following repository URL into the search bar on the right side: https://github.com/testRTC/watchRTCSDK-iOS
- Set the Dependency Rule to Up to Next Major and specify the version you need:
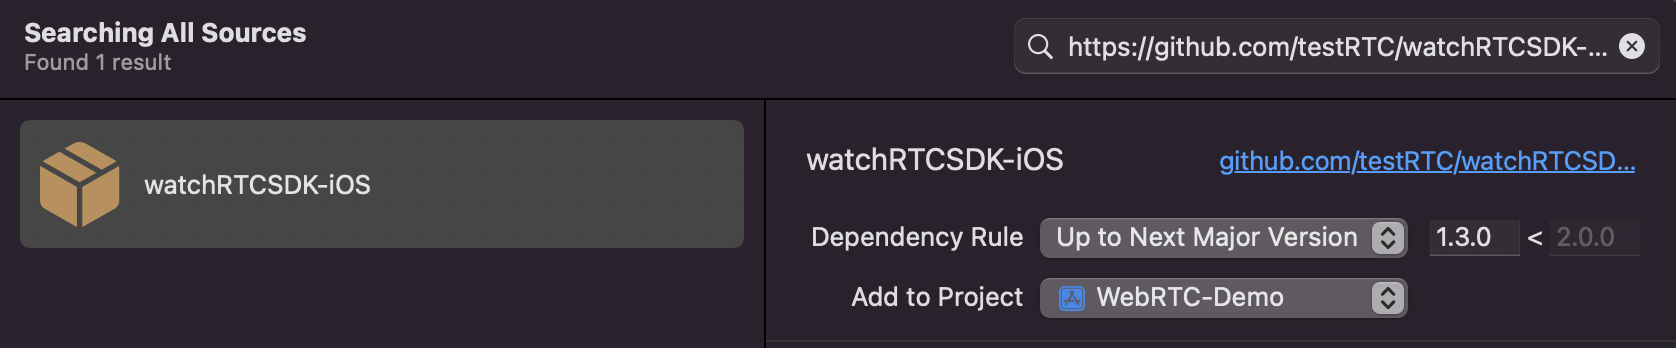
- Click Add Package, wait for the installation to finish, and click Add Package again.
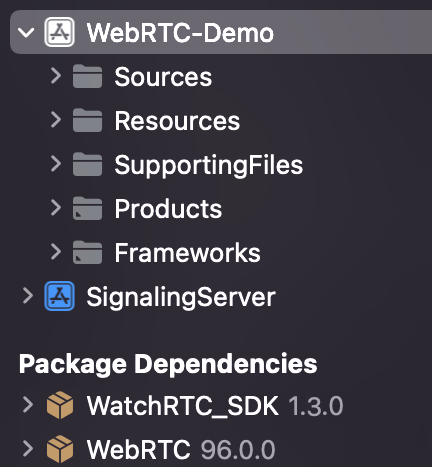
- The WatchRTC_SDK library is now added to your project. It automatically appears in the left pane under Package Dependencies:
CocoaPods
- To use WatchRTC_SDK in your project, add the following line to your ‘Podfile’:
pod 'WatchRTC_SDK'- Then, in the Terminal, run
pod install- In order to update the SDK to the newest version, in Terminal, run:
pod update WatchRTC_SDKManually
- Download the latest version of WatchRTC_SDK.xcframework. It can be done either by downloading a zip archive from the tags page or by cloning this repository with a git client.
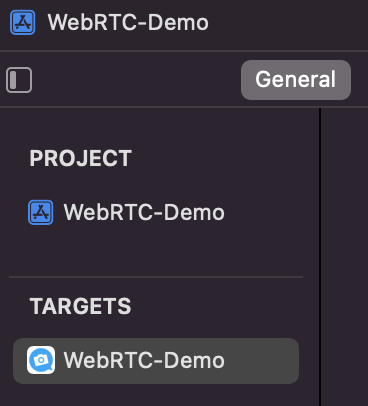
- Open your Xcode project and click on the project’s name in Project Navigator.
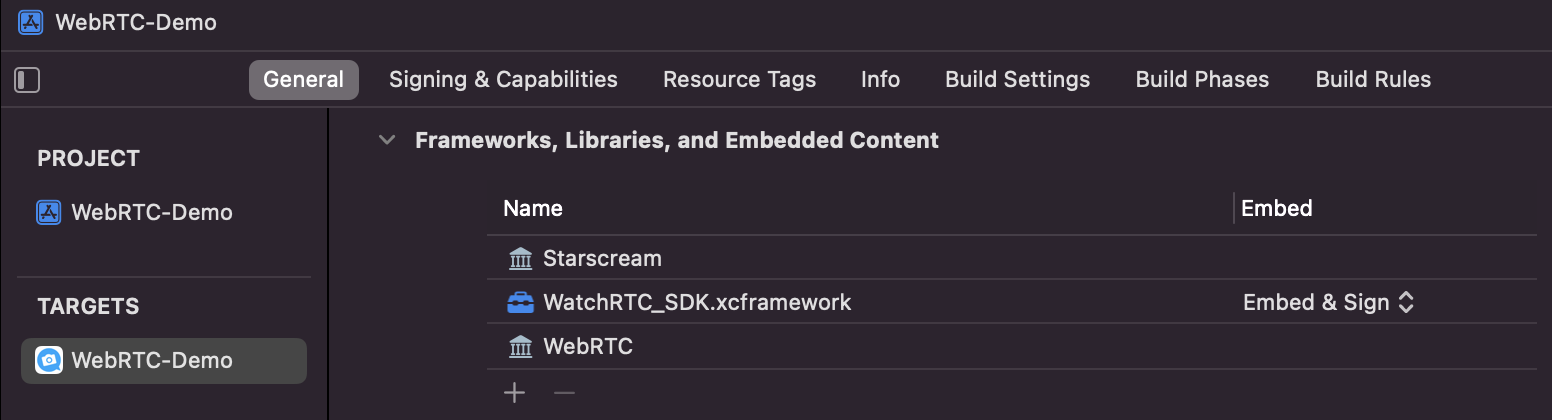
- Click on your app target to open your target’s “General” settings tab:
- Scroll down to the “Frameworks, Libraries, and Embedded Content” section.
- Drag and drop the WatchRTC_SDK.xcframework onto the “Frameworks, Libraries, and Embedded Content” section.
- Ensure that “Embed & Sign” is selected:
Initialize the SDK
Once you have added the remote binary as a dependency to your iOS application, you will now need to initialize the SDK. Before using any WebRTC APIs, you must add the following setup code to your application.
Import the framework
The below code should be added to the top of a source file of your application, where you would like to use the SDK.
import WatchRTC_SDKImplement the RtcDataProvider protocol
In order to provide statistics data to WatchRTC, your application should implement the RtcDataProvider protocol. The protocol should be implemented somewhere in your application where you have access to the WebRTC’s peerConnection object.
extension WebRTCClient: RtcDataProvider {
    func getStats(callback: @escaping (RTCStatsReport) -> Void) {
        // get stats report from peerConnection (or another source if you are not using WebRTC directly)
        // and call callback(stats)
    }
}
Initialize WatchRTCConfig with your API Key, Room ID, and Peer ID
The watchRTCConfig object must be initialized with your API Key, Room ID, and Peer ID. The rest is optional.
let config = WatchRTCConfig(
    rtcApiKey: "<your_api_key>",
    rtcRoomId: "room_id",
    rtcPeerId: "peer_id",
    keys: "optional keys dictionary"
)
Usage
Create WatchRTC object
// Optionally - pass config to the constructor
let watchRTC = WatchRTC(rtcDataProvider)
You must keep the watchRTC object in memory as long as you want to be connected to the testRTC’s servers.
If the config was not passed to the constructor, set it
watchRTC.setConfig(config)Connect to testRTC’s servers
// Call connect() when a peer connection is active
watchRTC.connect()
From this point, you can see your session on the WatchRTC dashboard.
Disconnect from testRTC’s servers
In order to close your connection to testRTC’s servers, you need to call disconnect()
// Should be called once the WebRTC's peerConnection is closed.
watchRtc?.disconnect()
Some things to remember:
- Once installed and initialized, you should decide on how to allocate rooms and peers
- Detailed API documentation is available on the watchRTC iOS SDK installation page.