You can now take the room and peer pages from the watchRTC History and embed them as an iframe component in your own web pages. Read on to learn more.
Why is this useful?
This is useful when you want to share such information with your OEM or large enterprise customers – or if you are looking into fusing this information directly into your own internal existing dashboards.
What does it look like?
The information is gathered from the testRTC dashboard and can then be embedded via iframe integration to any web page you would like to add it to. watchRTC iframe pages will be separate from the rest of the platform and will use external API endpoints to fetch data using a REST API key that you must first generate on our site. Click here to learn more about Creating an API Key.
Which pages can I embed?
The following pages support iframe embedding. To achieve this, the URL of each of these pages can be edited and used as the ‘src’ of the iframe. This process is explained below in step 1.
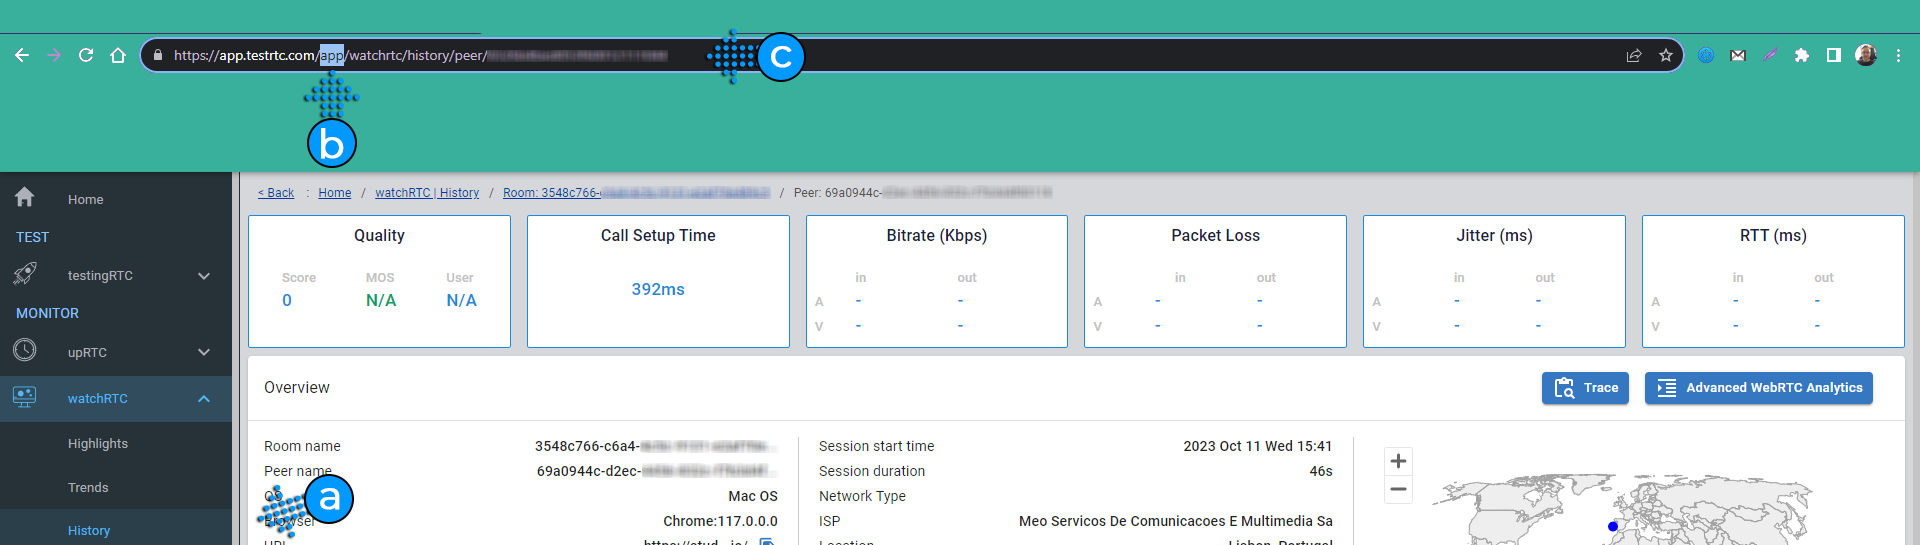
- watchRTC | History | Room:
- watchRTC | History | Peer:
- watchRTC | History | Peer | Trace:
- watchRTC | History | Peer | Advanced WebRTC Analytics:
How do I embed a watchRTC iframe?
Prerequisite: Before being able to embed watchRTC pages in an iframe you will need to inform testRTC support of the domain from which you intend to make requests. To do this, simply contact testRTC support and let them know the domain you intend to use to embed your iframe. They will then make the necessary configurations and you can continue to add your iframe.
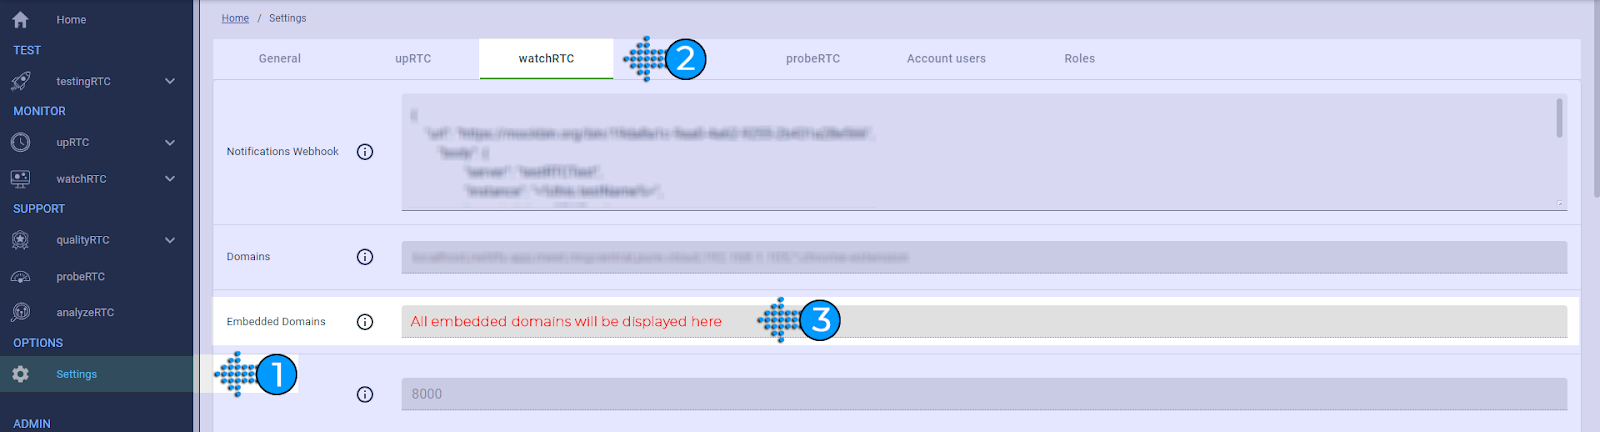
Note: You can review currently enabled domains in the Settings section under the ‘watchRTC’ tab. They will be visible within the ‘Embedded Domains’ field.
To embed an iframe in your application, do the following:
- Edit the URL of the watchRTC ‘History’ page you would like to embed: Visit the page you would like to embed in your application and within the URL replace the word ‘app’ with the word ’frame’. This URL will be used as the ’frameSrc’ in step 3b.
- Steps:
- Visit watchRTC ‘History’ page that is to be embedded.
- Replace the word ‘app’ with ‘frame’.
- Copy the URL.
- Add an iframe element in your web application: In this step, you’ll create an HTML <iframe> element on your web page. You must leave the ‘src’ attribute empty for now. This will be set programmatically.
- Construct the ‘frameSrc’ variable using the URL where the iframe content should load:
- Steps:
- Set the ‘frameOrigin’ to ‘https://app.testrtc.com,’ which is the expected origin for receiving messages in the iframe.
- Construct the ‘frameSrc’ variable using the URL where the iframe content should load, indicated by ‘${frameOrigin}/frame/PAGE-PATH’ (replace ‘PAGE-PATH’ with your specific path).
- Define an ‘apiKey’ variable, ensuring it holds your actual REST API key.
// Define the origin of the watchRTC frame
const frameOrigin = "https://app.testrtc.com";
// Use https://app.testrtc.com/frame/ instead of https://app.testrtc.com/app/ when embedding pages
const frameSrc = `${frameOrigin}/frame/PAGE-PATH`;
const apiKey = "YOUR-REST-API-KEY";- Add Event Listeners: The best way to ensure that the iframe has loaded correctly is to add event listeners to the iframe element that triggers when the iframe has fully loaded.
- Listener 1 | Check details and wait for acknowledgement:
When this event occurs, it checks if both frameSrc and apiKey are defined, and if so, it starts sending the API key to the iframe every 100 milliseconds until the iframe acknowledges it.
let intervalId;

      // send a message with an API key to the iframe repeatedly to make sure it receives it after loading
      iframeElement.addEventListener("load", (event) => {
        if (frameSrc && apiKey) {
          intervalId = setInterval(() => {
            iframeElement?.contentWindow?.postMessage({ apiKey: apiKey }, frameOrigin);
          }, 100);
        }
});- Listener 2 | Receive acknowledgment and stop sending the API key:
This second event listener is added to the window to receive messages from the iframe. When a message is received from the iframe with the property ‘isSuccess’ set to a boolean value, it clears the interval previously set, stopping the repetitive sending of the API key.
// receive a message from an iframe saying if the initialization was successful
 window.addEventListener("message", (event) => {
        if (event.origin === frameOrigin && typeof event.data?.isSuccess === "boolean") {
          clearInterval(intervalId);
        }
});- Assign the “src” Attribute: The ‘src‘ attribute of the iframe is dynamically assigned by programmatically setting it to the value of ‘frameSrc‘ once the event listeners are in place, guaranteeing their proper execution.
     // set iframe's src only after adding event listeners to ensure that they run properly
      iframeElement.setAttribute("src", frameSrc);
Result: After receiving the API key in the iframe, watchRTC will then use this key to authenticate requests made to its external API endpoints. This allows you to retrieve data related to testRTC testing and monitoring using the REST API.
iframe integration example script:
For best practice we have created this script, designed for integrating WatchRTC content from testRTC into your web page and ensuring that the iframe receives an API key for authentication.
Remember to customize the ‘frameSrc’ and replace ‘YOUR-REST-API-KEY’ with your actual REST API key.