Running probeRTC installation on your Mac requires you to download and run a disk image file on your Mac. After receiving an email from the support team, you need to click on the ‘.dmg’ file. The email you received contains the unique API key you need to successfully install the software.
About this task: To install the masOS application and start your probe, do the following:
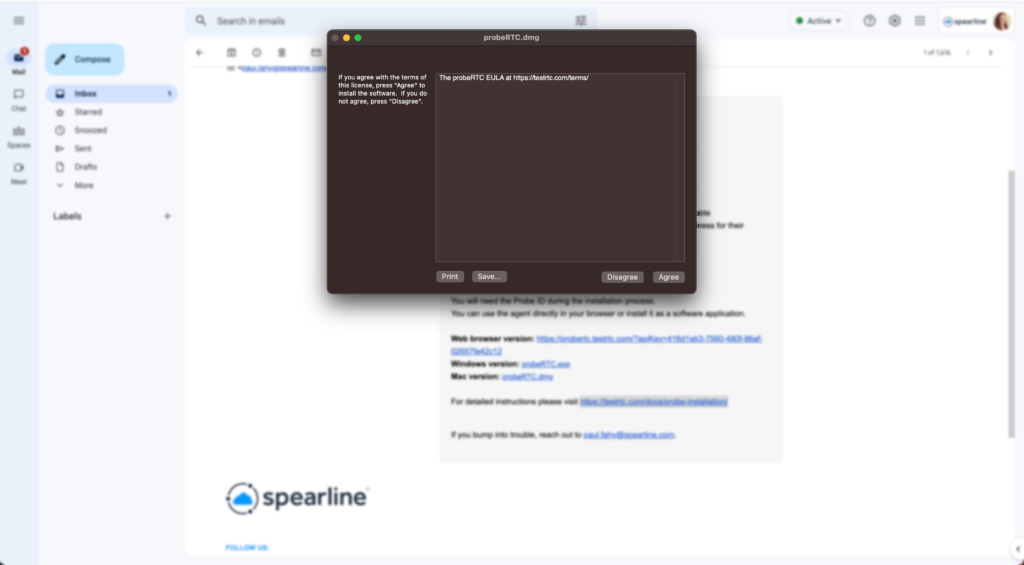
- Download: Click on the link (Mac version) that you received in the email to start downloading the software. You will be presented with a EULA agreement. You must agree to the EULA to continue with the download.
- Locate: After the download has completed you must locate the .dmg file on your Mac. This should be in your “Downloads” folder, unless you’ve specified a different location
- Copy to the “Applications” folder:
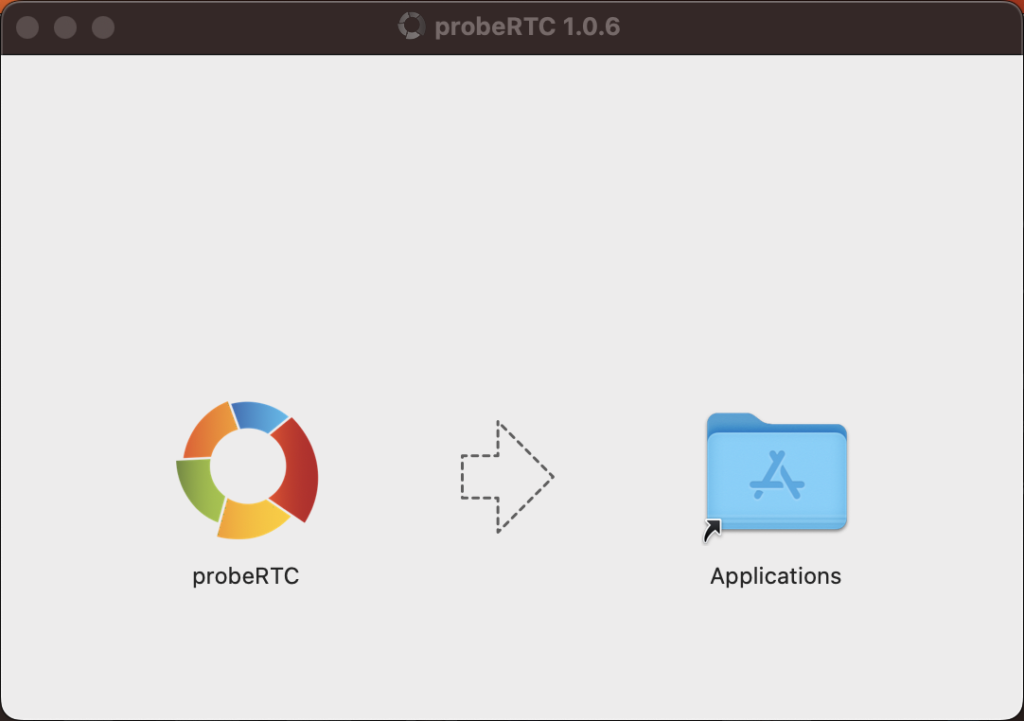
- Double-click the .dmg file to open it. This will mount the image and reveal its contents.
- Drag the application icon to the “Applications” folder shortcut. This will copy the application to your “Applications” folder.
- Once the application has finished copying, you can eject the .dmg image by clicking the eject icon next to its name in the Finder sidebar, or by right-clicking the .dmg file and selecting “Eject.”
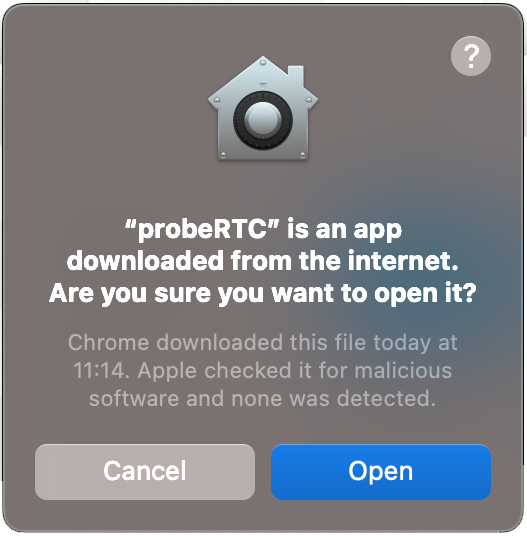
- Launch: The application should now be installed and ready to launch. You can find it in the “Applications” folder and launch it from there. When launching the app for the first time you will be presented with a warning message. You can safely ignore this message and click Open to continue.
- API Permissions: After launching the app you will be asked to provide permissions for the API in order to allow the probe access to documents and data in “System Events” and to perform actions within the app. You must allow these permissions in order to use the application. Click OK to continue.
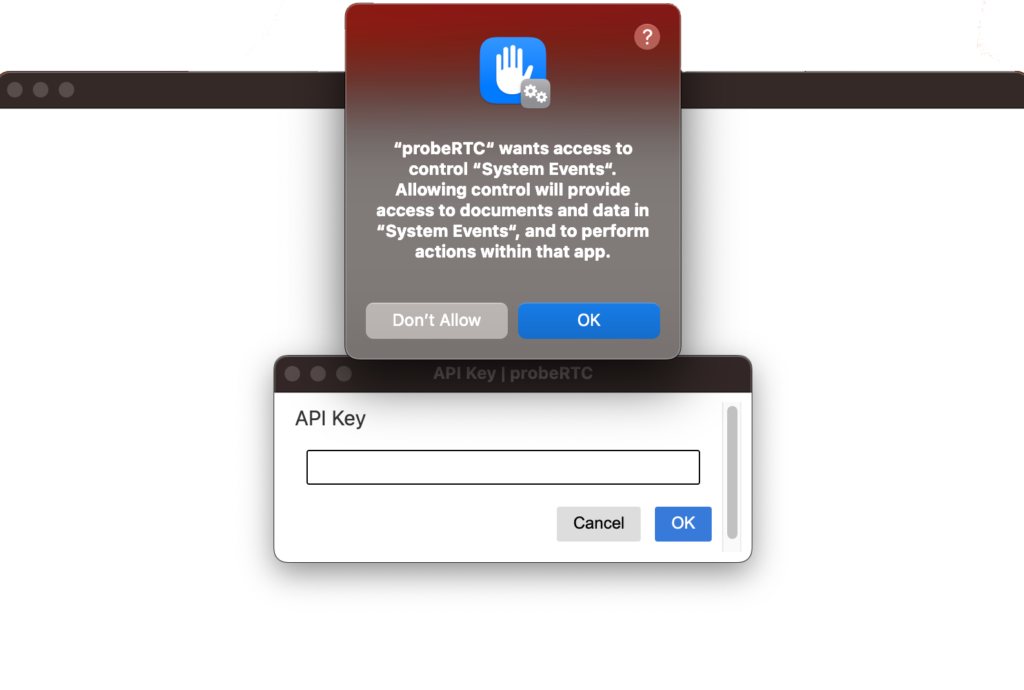
- Add your unique API Key:
- You must then retrieve the API Key (Probe ID) that was sent to you by email.
- Paste the API Key in the field provided and lick OK to complete the setup.
- Probe is now active: Let the probe run for some time and then you can click on the SHOW LOG button to view the analytics of the test.
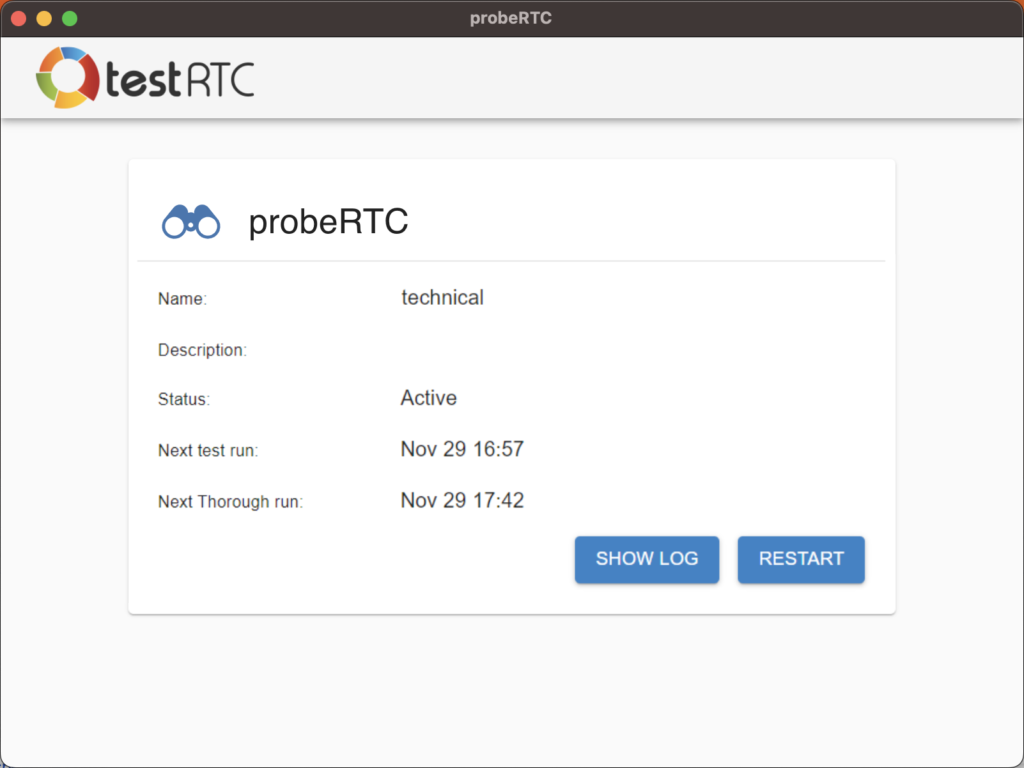
Results: Now that your probe is running you will have three options:
- SHOW LOG to view the results and depending on the frequency of testing that the administrator configured, you can check the results of your network connectivity.
- HIDE LOG (the opposite of ‘SHOW LOG’ ) to hide the logs.
- RESTART to begin the probe again.